
· typing practice Kenya
Touch Typing for Beginners: Start with the Home Row
14 min read
Most typing advice assumes a keyboard sits on your desk every evening. What if the only computer is a shared lab machine, or the family phone is the device you hold?
Touch typing means typing without looking at the keys. It starts with eight keys, the home row. Each finger learns a small territory and comes back to the same place after every letter. That habit matters more than speed when your time on a machine is short.
You can learn the positions on paper before you sit at a computer. A printed finger map, a spoken prompt, and a few minutes on a shared keyboard are enough for a first drill.
Table of Contents
- The Eight Home Row Keys and Who Types Them
- How to Sit So Your Hands Stay Relaxed
- Your First Five-Minute Home Row Drill
- Common Mistakes and How to Fix Them
- When and How to Move Beyond the Home Row
- Start Your Home Row Lessons Today
The Eight Home Row Keys and Who Types Them
Each finger owns a small territory on the keyboard, so your eyes can stay on the screen. Eight keys form that territory. The left hand rests on A, S, D and F. The right hand rests on J, K, L and the semicolon. Both thumbs rest on the space bar.
Those eight keys are the home row. Every other letter is a short reach from one of them, then a return.
The finger map
| Finger | Home key | Other keys it reaches | Quick tip |
|---|---|---|---|
| Left pinky | A | Q, Z | Reach up or down, then return to A |
| Left ring finger | S | W, X | Keep the rest of the hand still |
| Left middle finger | D | E, C | Lift only the finger, not the wrist |
| Left index finger | F | R, T, G, V, B | Feel the small bump on F to find home |
| Right index finger | J | Y, U, H, N, M | Feel the small bump on J to find home |
| Right middle finger | K | I, comma | Press with the fingertip |
| Right ring finger | L | O, full stop | Return straight back to L |
| Right pinky | semicolon | P, slash, apostrophe | Keep the wrist level |
| Both thumbs | space bar | none | Use whichever thumb is free |
Every finger returns to its home key after each stroke. The left index finger may reach for R, T, G, V or B, but it comes back to F. The right pinky may press P, the slash or the apostrophe, then it settles on the semicolon again. A finger that stays out on a reach makes the next letter start from the wrong place, and the whole hand begins to drift.
Why the bumps matter here
Many Kenyans use a phone far more often than a computer, and a touchscreen never asks your fingers to hold a fixed position. A keyboard does. The small bumps on F and J let your index fingers find home by touch alone, which matters when you sit down at a shared lab machine you have never used before and your time on it is short.
You can learn this map without a machine at all. Copy the table onto paper, rest your fingers on the eight drawn keys, and ask a friend to call out letters while you tap the correct box. The same finger does the same job, screen or no screen, so the minutes waiting for a computer still count as practice.
If the machine itself still feels new, the computer basics for beginners guide covers the parts of a computer before you chase speed.
Practical rule: Find F and J by the bumps, then trust the map instead of your eyes.
How to Sit So Your Hands Stay Relaxed
A tense sit turns into tense fingers. Set the chair before you type, especially when the last learner left it at the wrong height.
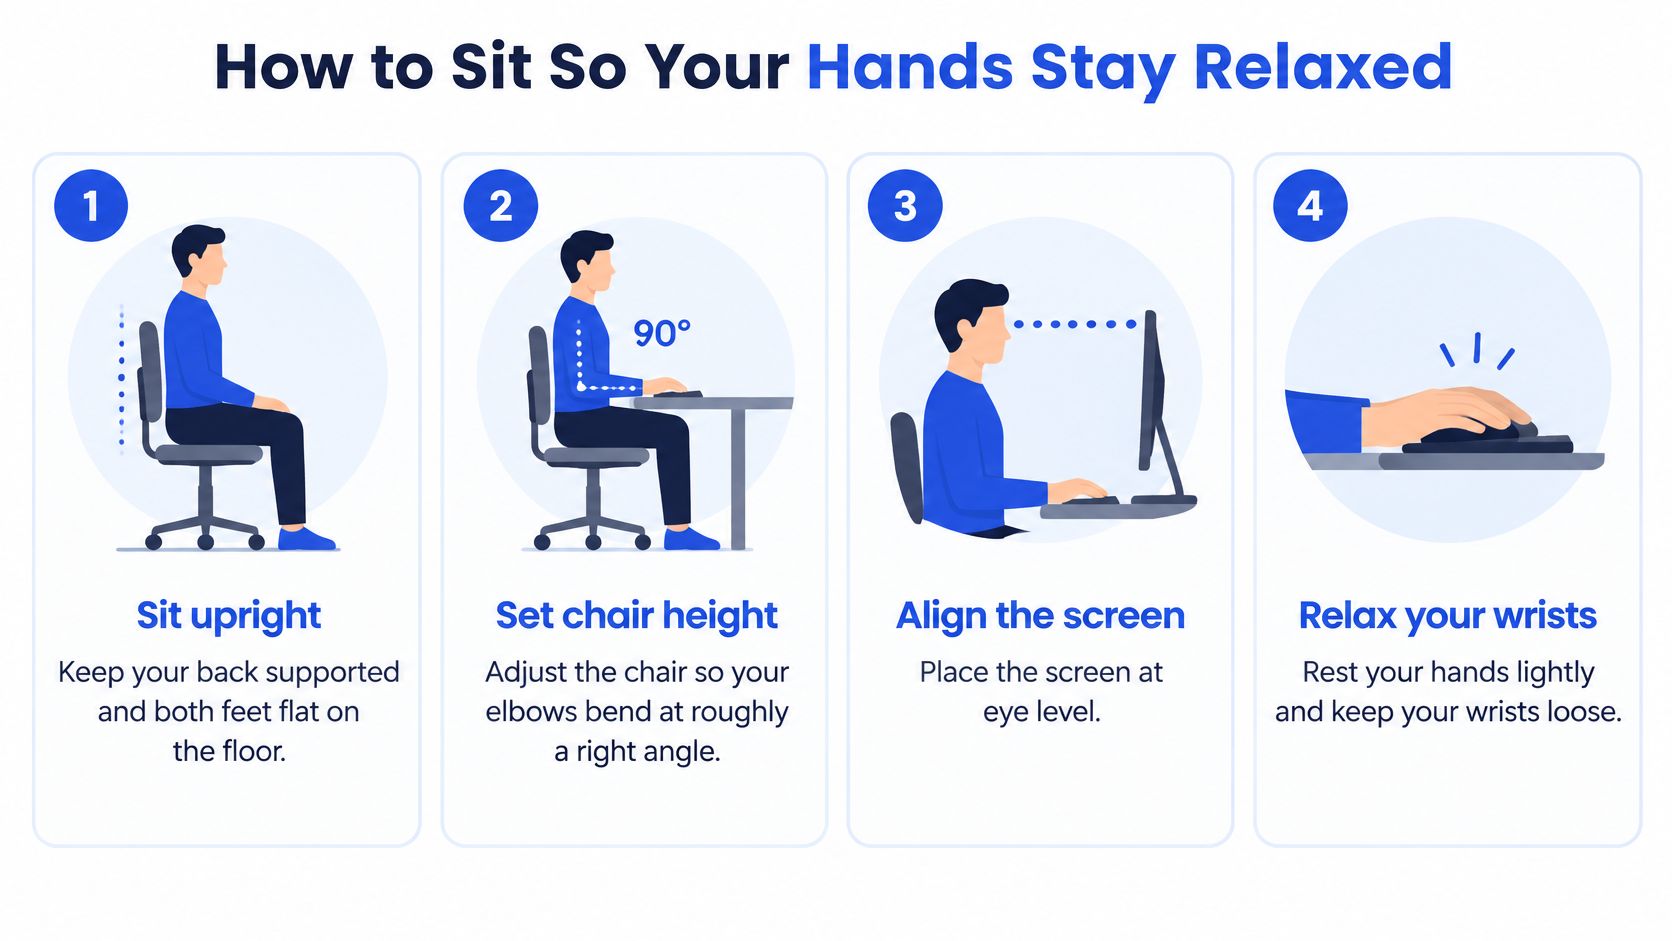
- Sit upright with your back supported and both feet flat on the floor. A slumped back pulls your eyes toward the keys and starts the hunt-and-peck habit.
- Adjust the chair so your elbows bend at roughly a right angle and your forearms sit level with the keyboard. Raised shoulders make you press harder than the keys need.
- Place the screen at eye level, about an arm's length away. You should not tilt your head to read the line you are typing.
- Rest your wrists lightly, not pressed hard on the desk or the front edge, and keep them above the keys. A hard rest tires the wrists in a longer lab session.
- Curve your fingers over the home row without tensing them. Stiff fingers reach with the whole hand instead of one fingertip.
- Press each key with a quick, light stroke from the fingertip. The key should rebound on its own.
If someone else set the chair last, change it before you start. If the screen sits too low, raise it with books or a stack of paper. The same check works at a cybercafé desk or a classroom bench.
Kenya's Grade 7 Computer Science curriculum explicitly includes practising typing with the home keys, then using the keyboard to type simple text and make corrections. A calm sit is part of that practice, not an extra. Repeated, self-correcting tries match the curriculum's learning to learn competency.
Finger control takes the same patience as early music practice. A step-by-step piano guide for beginners shows how slow, separate finger moves become automatic, which is the same idea you want at the keyboard.
Before every session, check three things:
- Sit: Back supported, feet flat.
- Hands on home: Fingertips on A S D F and J K L semicolon, thumbs on the space bar.
- Eyes up: Screen at eye level.
If your shoulders or wrists start aching, stop, drop your hands to your lap, and reset the chair height before you continue.
Your First Five-Minute Home Row Drill
This drill needs a printed sheet or a few minutes on a device. Copy the words onto paper if the lab is full. Tap the letters on a drawn keyboard, or on your lap, until a machine is free.
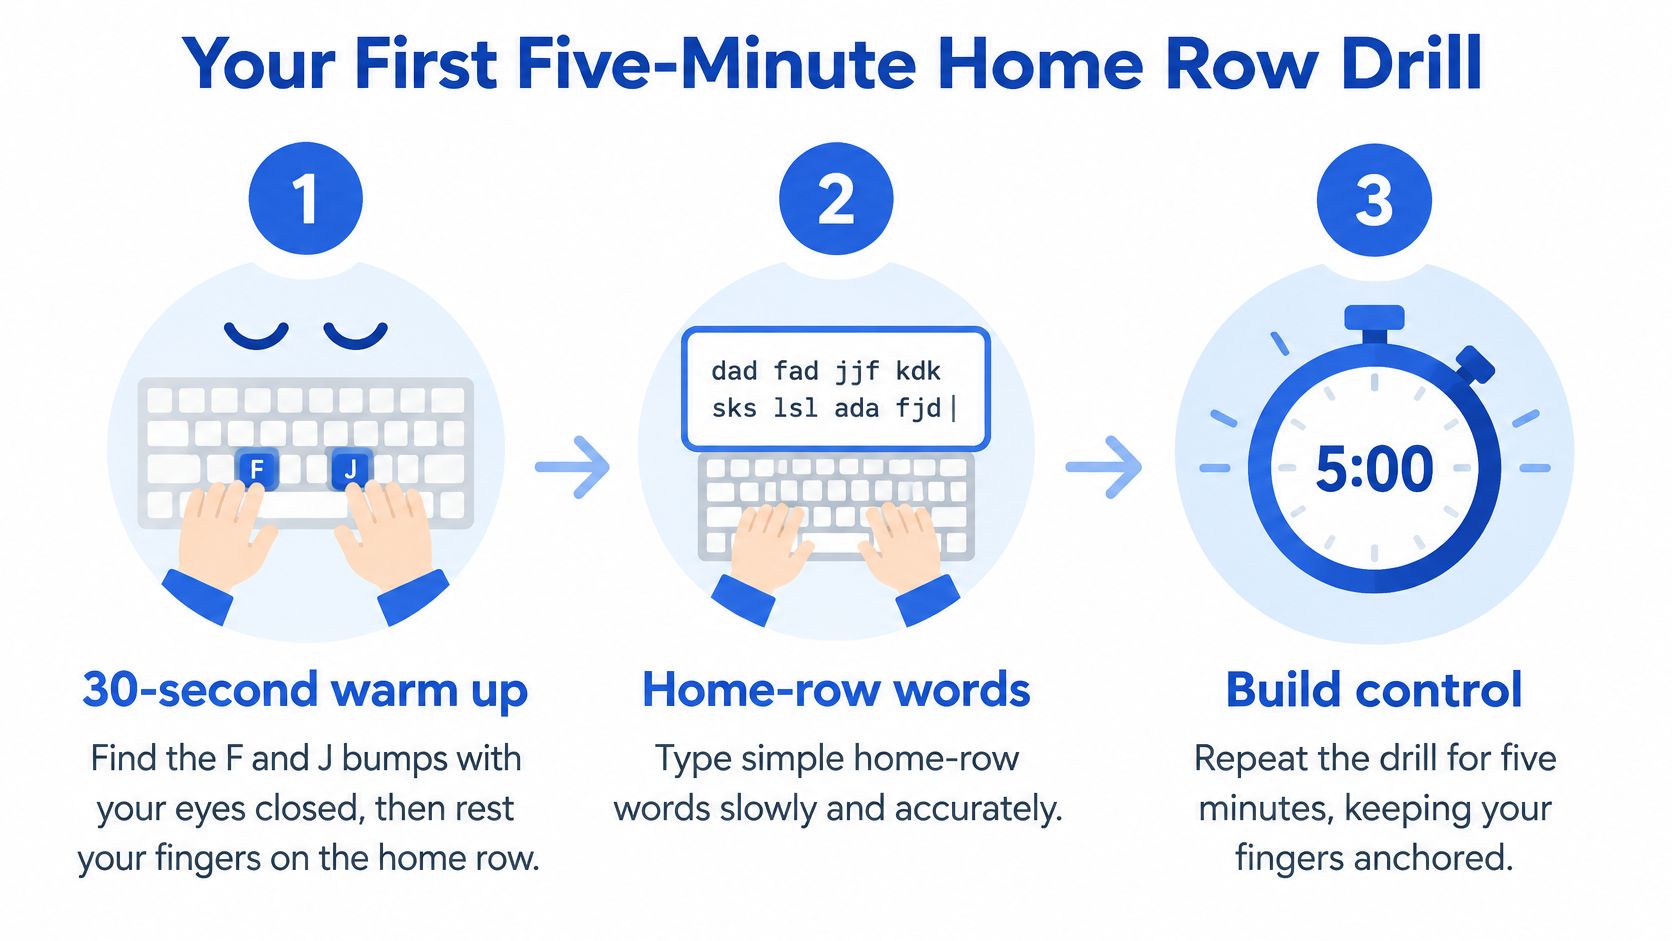
- Warm up for 30 seconds. Close your eyes, find the bumps on F and J, then rest the other fingers on the home row. You are teaching your hands a starting place before any word appears.
- Type these home-row words slowly, in an even rhythm: sad, lad, dad, fall, lass, flask, salad. Use only A, S, D, F, J, K, L and the semicolon. Slow typing keeps the correct finger on the correct key.
- Keep your eyes on the screen or on the printed prompt. If you cannot find a key, pause and feel for the bump. A look down teaches your eyes to do the work your fingers should learn.
- Run three one-minute tests. Log gross words per minute, the error count, and corrected errors on three separate lines. One mixed score hides mistakes inside a faster time.
- Hold a mastery target before you add any new key. A structured progression for Kenyan beginners supports 90–95% character accuracy across three consecutive one-minute home-row tests. The same account describes keyboarding at Likoni School for the Visually Impaired as an early skill, built before documents, research, and online assessments.
- At minute five, write down the one key you searched for most. That key is tomorrow's practice, not a reason to start the whole keyboard.
When three learners share one machine
Rotate every few minutes. One learner types, one reads the prompt aloud, and one watches finger placement. Then switch. The reader can hold the paper. The watcher only says which finger left home, not the letter that was wrong.
Say the word, type it, and return every finger before the next word. Silence between words is useful, not wasted time.
Both thumbs stay on the space bar the whole time. Add the upper or lower row only after the accuracy target holds. A typing practice plan for students is the right next read once these words feel boring, which is a good sign.
Common Mistakes and How to Fix Them
Looking down is the mistake to catch first. Your eyes chase a letter your fingers cannot find yet, so the hands never get a chance to learn the distance.
Use the table as a diagnosis sheet. Pick one row for the next session instead of trying to fix everything at once.
| Mistake | Why it happens | Fix |
|---|---|---|
| Looking down at the keys | Eyes chase a letter the fingers cannot find yet | Cover the keyboard with a sheet of paper and feel for the bumps |
| Hitting keys too hard | Tension from nerves or slow typing | Tap lightly and let each key rebound |
| Using only two fingers | Habit from phone use or hunt-and-peck | Give each finger one key and return it home after every stroke |
| Rushing ahead | Wanting speed before accuracy is steady | Hold the 90 to 95 percent accuracy target before adding rows |
| Pressing with the nearest finger | Reaching for a key without checking the map | Slow down until the assigned finger reaches it without thinking |
| Fingers drifting from home | No habit of returning after each key | Pause after every letter and place the fingers back on F and J |
A hard hit feels decisive, but it drains energy and makes the next error more likely. Think of a light tap that lets the key spring back under your fingertip.
Two fingers feel quick on a phone. On a full keyboard they cap both speed and accuracy, because the same two fingers travel across keys that belong to the pinky and the ring finger. Give each finger its home key for one full minute, even if the minute feels slow.
A lab fix you can do today
Say you share a computer in a crowded lab. You peek at the screen and at the keys in the same second, and the person waiting behind you makes you rush. Lay a sheet of paper over the letter keys so the bumps are the only guide. The paper does not need to be perfect. It only needs to block the habit of searching.
Pressing with the nearest finger is a reach error, not a speed problem. Slow that one key until the assigned finger moves without a debate. Fingers that drift after each letter are why the return-to-home habit exists. Pause after the letter, feel F and J, then type the next one.
Rushing before accuracy settles builds hunt-and-peck moves that are hard to undo. A Pretty Progress guide to better goals is a useful reminder that a target you cannot check will push you to chase the wrong result. In the next session, check looking down before you check anything else. You are ready to add keys only when that look has mostly stopped.
When and How to Move Beyond the Home Row
Add keys in a fixed order. Start with the upper row, Q through P. Then add the lower row, Z through M. Capitals come next, typed with the opposite-hand Shift key, so a capital A uses the right pinky on Shift while the left pinky presses the letter. Punctuation follows last. Accuracy stays ahead of speed at every step.
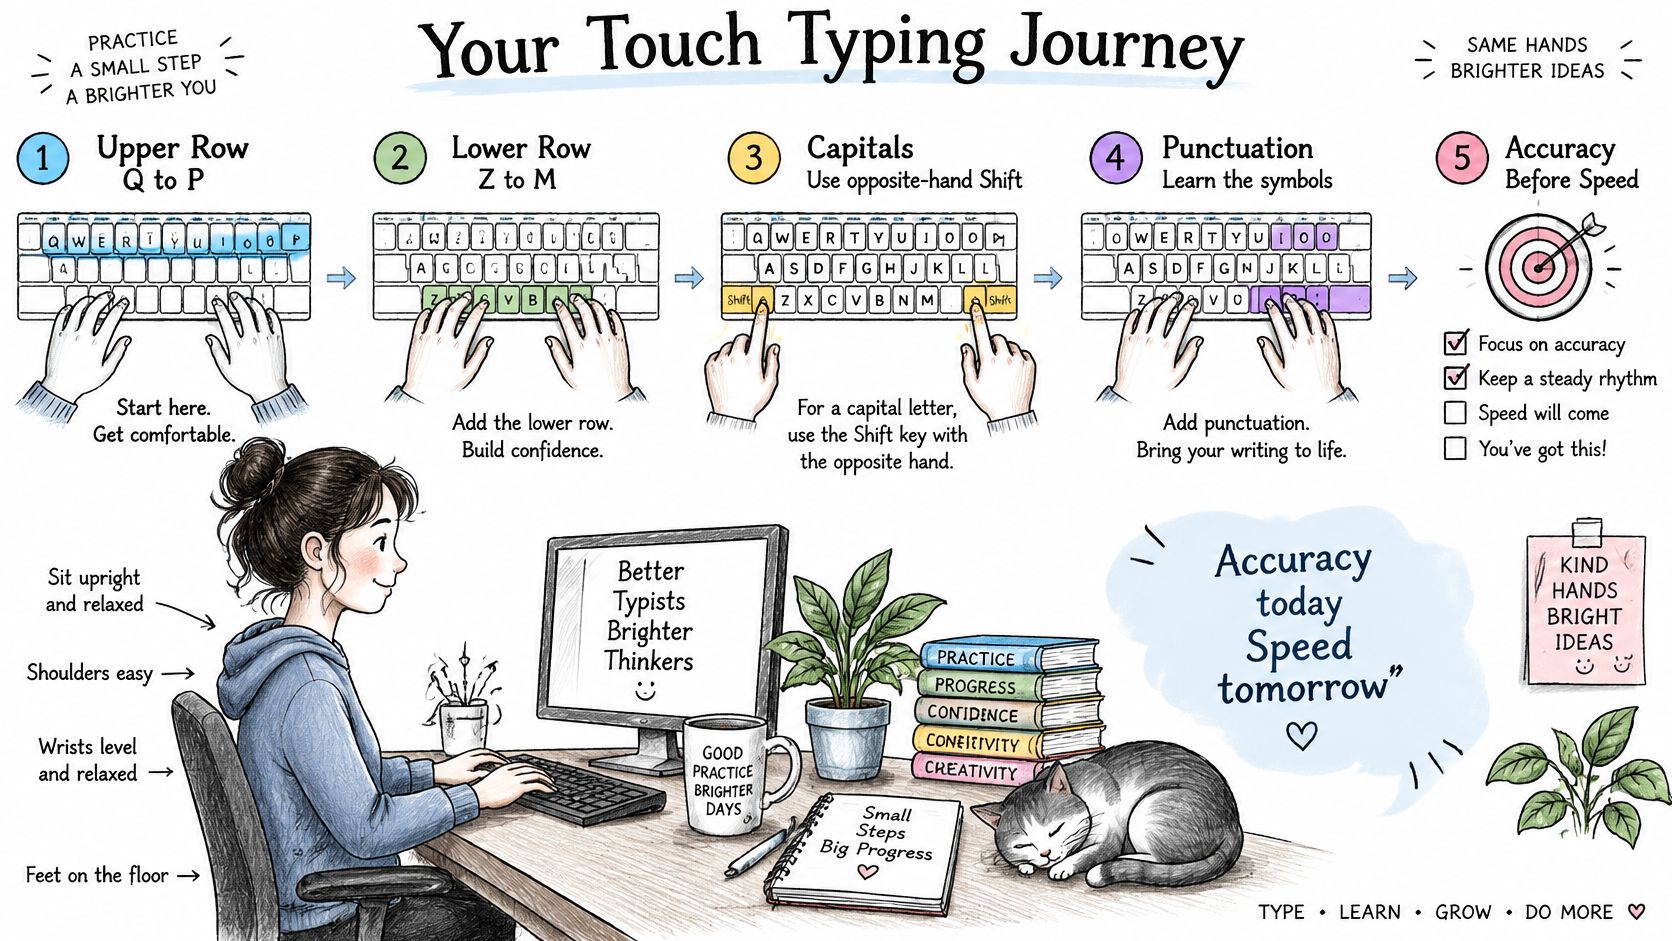
Check yourself against measurable targets before you leave the home row. Do not move on because a friend has already started the top row.
| Milestone | Target | How to check |
|---|---|---|
| Home-row accuracy | 90 to 95 percent across three consecutive one-minute tests | Count errors separately from speed |
| Visual key searches | No more than two per minute | Notice each time you look down during a test |
| Passage length | A three to five minute passage after about four weeks of brief, frequent practice | Time the passage and log corrected errors |
| Upper row | Add only after home-row accuracy is steady | Start with the keys nearest the home row, then extend |
In a 21-educator study across three public schools in Machakos, teachers reported that the proportion of students who were not at all proficient with computers, applications, and online information exceeded those rated somewhat or very proficient, while limited classroom resources constrained digital-literacy delivery. On shared devices, the practical answer is steady repetition. Short, frequent sessions on whatever machine you can reach give the home row time to settle before any upper-row key joins in.
Low speed on its own does not mean failure. Old hardware and a small keyboard pull the number down even when your fingers are doing the right work, so a week on a family phone reads differently from a week on a full-size lab keyboard. Compare each new score against your own log, and for a plain reading of what a student speed means, use the guide to a good typing speed for students.
A weekly error log
Keep five counts on one page, whether you are a learner at home or a teacher watching a room of mixed devices:
- Wrong-finger errors: The letter is right but the wrong finger pressed it.
- Omitted spaces: Words run together because a thumb never moved.
- Repeated letters: A key was held too long.
- Capitalisation errors: Shift came from the same hand as the letter.
- Visual searches: Each look down gets a tally mark.
If you are still on paper or on a phone, reuse the offline word sheet from the five-minute drill and mark the same five counts in the margin. When one count stays high for a full week, that count names the drill for the next one. Secondary computer-studies work asks learners to explain the QWERTY layout, type on a keyboard, and use a typing tutor, so this order matches the practical work you will be asked to show.
Start Your Home Row Lessons Today
You already have everything you need: the eight keys, the sitting posture, the five-minute drill, and the home-row words. Run the drill on a device when one is free and on the offline word sheet when it is not. Paper days count the same as screen days.
Phone-number sign-in gets you into Keybaki in under a minute, and students can sign in with a PIN on the family phone with no email required. From there they take CEAs, watch weak strands shrink, and build streaks. Keybaki works on the family phone and can be used offline once content is loaded, so a booked lab or a power cut does not have to end a streak.
A seven-day plan:
- Days 1 to 6: One five-minute drill each day, using the home-row words, on paper or on a device. Set your posture before you start, and return your fingers to F and J after every key.
- Day 7: Run the readiness check. Accuracy, visual searches, and a timed passage.
- Move up only when those three milestones are met. The upper row waits until then.
If a milestone slips, repeat the week. Seven more days on the home row costs less than relearning a wrong reach later. When a finger hesitates mid-word, stop, reset on the anchor keys, and start the word again.
Teachers who want a short demo on a shared screen can look at using online videos in your classroom and play one home-row demonstration while the group follows along on paper.
Keybaki is a competency-based platform built in Nairobi for Grades 7–12, so home-row practice sits next to the rest of your computer studies on the device you already share. Visit Keybaki and start day one tonight.
Comments
Loading…